Search This Blog

Monday, 23 December 2013

Last minute DIY Christmas gifts- from kids and for kids

Good morning gentle readers!

This is the last day I will see most of my daycare children before Christmas.  I have all their little gifts here ready and waiting for them.  In looking at them it occurred to me that many of you might be frantically looking for some quick easy and inexpensive gifts either for kids or from kids.  I will share on of each with you today.

Project 1: From kids to just about any adult
              Hand print coasters.

These are easy peasy lemon squeezy! First you will want to run out to Lowes or Rona and get yourself four white 4x4 ceramic or porcelain tiles. Apparently Home Depot no longer sells them, so save yourself a trip there.  They will cost roughly 30 cents each, so $1.20 for a set of four.  Then you'll need little rubber feet for the bottoms of the tiles (you don't want the tiles to scratch the very surface they are intended to protect) these can be found at the dollar store for $1.

Adhere a little rubber foot to each corner of the back of the tile.  Then paint your childs hand with acrylic craft paint and press their hand onto the tile.  I had one child who flat out refused to open her hand for me. So her parents got footprint tiles instead.  Its okay if the hand print smudges a little, the idea is to capture a moment in time with these kids and that kind of stuff happens with kids.

I like to write the childs name and current year underneath the hand print. This year I used Sharpie paint markers to do this. Last year I used regular Sharpies. Here is what I learned: If you use the paint markers you may finish your project right away.  If you use the regular Sharpie you need to let it dry for a few hours before your last step.  If you do not your writing will smudge and be illegible.

Finally I did a quick coat over the tile with a clear sealant spray paint (can be found at Lowes, Rona, Home Depot ect but I had some on hand).  Let that dry for a bit and....

Taa-daa!!
 Not including clear coat dry time this project will take a total of about five minutes and less than $2.50.


Next is project 2:  From myself for kids.
                            DIY colouring book

This is something I have made for many children and something that has really been treasured and loved.  Every year I make a point to snap photos of my day care children doing some of the fun things we do. Then at the end of the year I compile these photos along with one photo of each child.  This year I ended up with a total of 17 photos to turn into a colouring book.

Once you have your digital photos taken you will want to get some folders to hold all the pages.  I got a four pack of duo tangs from the dollar store for $1, so 25 cents each.  I also picked up a 24 pack of Crayola crayons there for $1.25/pkg.  You could also make your own crayons (in fact I encourage it).  If I had more broken crayons kicking around thats exactly what I would have done (and have done in the past).
25 cents for a folder
 In order to change your photos into colouring book pages you'll likely want a copy of Photoshop. Or, make friends with someone who has a copy ;)

Open your photo in the Photoshop program. Make sure its on a 8.5x11 size. That's the default size so you're probably alright without fiddling around with anything.

Go up to the toolbar across the top and choose the Filter bar.  From the drop down menu choose Filter Gallery.

Once that opens I find that my photo has been zoomed in on so large I really can't see it.  If that's a problem for you as well go to the bottom left corner where it says 100% and change it to read 25%.


Next, on the right hand side of the page choose the Photocopy option. Now it's starting to look like a colouring book! Even further right you will notice options for Detail and Darkness.  Play with those slide bars until you like the look of your page.  I usually had mine somewhere around the 18-20 range but it will depend on the individual photo.   Click OK in the top right corner when you're done.

Usually I try to take out the "noise" of the background so the kids can just colour the subject.
To do this I go to the left hand side and choose the eraser option.  Once the eraser option is selected you will see the size dial for the eraser appear directly under the word Edit at the top of the page.  If your eraser doesn't have an outline around it you likely have Caps Lock on.  Once you're done erasing anything you don't like you're done!

Just print, hole punch and add to your folder.

Total cost here $1.50.

Here are some examples of the pages in this years colouring book:

Walter

Audrey

The kids had coloured masks
 And that's it, folks!! Less than an hour of your time and $5 of your money and you too could have two pretty adorable gifts.

Thursday, 19 December 2013

DIY toy organization for under $15

Back when I first started my home daycare I quickly realized that I was in need of a toy storage solution. I kept finding systems like this but I was never going to pay $70. Especially when I think these things are kind of ugly...

Over the years I have tried to come up with many different options ranging from mesh hampers to Rubbermaid totes.  Nothing worked perfectly, but it worked well enough that I didn't feel the need to part with $70 for one of those brightly coloured things.

A friend and I were talking recently and she mentioned that with Christmas quickly approaching she needed toy organization more than ever.  But it had to be functional and affordable and, in a perfect world, not ugly.
In our searches we had both come across the same photo...
http://www.dumpaday.com

It had no tutorial and I suspected it would turn out to be one of those Pintrest Fail things.  But my friend believed in our combined handiness/craftiness so I agreed to help and we decided to try to recreate this storage solution for her sons toys.

The first things we did was buy ten buckets from the dollar store for $1.25 each ($12.50) and one package of fun coloured zip ties, also from the dollar store.
Our dollar store purchases

The buckets we choose had rope handles on them.  Although we never intended to keep the rope handles they were a nice plus because that gave us two pre drilled holes in each bucket.

Our first step was to remove the rope handles.
*snip*

 Then we used a small sized zip tie to attach the buckets together at the top with the pre drilled holes.  We trimmed the excess zip tie after.
zip tied together
  We thought for added stability we should also zip tie the buckets together at the back.  Using a Sharpie we marked where we were going to drill our holes.
marked the location of future holes
 Then, with the help of a drill put holes in the buckets.
Power tools make me happy
 Zip tied them together again.
Ziiipppp
 Then we did a little happy dance in her kitchen because it looked like this was actually going to work like we had hoped!! Unfortunatly I was too caught up in the happy dance to take a photo of it for you. ;) Our bottom row was four buckets.  Then we started on the next row up.   This row had three buckets so we stared out by repeating the steps for the bottom row.  But then we had the added challenge of attaching this row to the bottom.    We eyeballed where we thought holes should go, marked and drilled.
second row going on. 
 Then we zip tied those babies right on there.
SO thrilling!
 Then the next row had two buckets and the top just had the one.
We added a few of the kids toys and.... its perfect!!!
Taa-daa!!!
Whole project from start to finish only took a bit over an hour and the most complicated thing you need for it is a drill.  So, gentle readers, I think everyone should give this a try!

Wednesday, 18 December 2013

How I treated my ear infection for $0 without a trip to the doctor

It wasn't my plan to wake up this morning and write a blog post.  But I am just so excited I thought I would share with you how I cured my ear infection!

Okay, so it's not a sexy or even festive blog topic.  But it works!

Back on Friday I had a friend over for an ice cream date with some much needed catching up. Even though my friend is very interesting and I had been looking forward to our date for some time I kept finding myself distracted my ear pain.  I have had ear infections before and knew that was exactly what was causing the pain.
My doctors office is open on weekends for walk- in care but I really did not want to drag my kids down there and wait in the waiting room for 40 minutes to be told what I already knew- that I had an ear infection.  I also did not want to shell out for a prescription.  But what choice did I have?

That question kept floating around in my head because I couldn't shake the feeling that I did have a choice, that I had read of a home remedy somewhere....

So I looked it up and there it was, hydrogen peroxide! A bit in the ear, it said, and I would be cured!

Saturday evening I laid on my side on the couch and had That Guy put a few drops of peroxide in the affected ear. I left it in for four minutes and then sat up and wiped the peroxide out.   By later that night I noticed that there was much less pain in my ear.  But the infection was not gone. I was a bit disappointed in this home remedy to be sure.

When I woke up Sunday morning it was the same story, ear better than it had been on Friday but ear pain still wasn't gone completely.  I thought it was worth one more try.

This time instead of using a couple of drops I had That Guy put about half a cap full into my ear.  Then I laid still for ten minutes instead of four.  When I got up I rinsed my ear with warm water.  And immediately the pain was gone (I felt like I had water in my ear- because I likely did from rinsing- for about an hour or so after but NO PAIN)!  Even though I didn't hurt any more I was still skeptical. I mean this hadn't worked the first time. So I reserved judgement.  I had planned to write on Monday about the results of my attempted home remedy.  But you might notice that when body parts do not hurt they are largely forgotten about.  I only remembered now because I was putting the peroxide away.

It is a bit of a strange sensation to have the peroxide fizzing and bubbling away in your ear for ten minutes.  But since those ten minutes saved me hauling the kids to the doctors office and paying for a prescription I was happy to put up with it.

Now, gentle readers, I want to be perfectly clear. I am not a medical doctor. But this home remedy just might be worth trying next time you or your little ones get that old familiar ache.
Our peroxide, this family's fix-it-all.


Monday, 16 December 2013

DIY Elf doughnuts

So I was going to write about all the great, easy, inexpensive, unique and creative holiday gifts I had made for That Guy.  Guys are hard to gift for so I wanted to help you all out.  But lets be honest, gentle readers, I have precious few ideas for him let alone completed gifts.

Instead I will be writing about something I DO have, an elf on the shelf.  This is not a placement idea blog. This is our first year with Tim (our elf) so I have not yet documented enough ideas to write a post about.  Hopefully next year.
Last night I was scrolling through a friend's Facebook page looking at the photos of his elf on the shelf.  One night he caught his elf polishing off the last of a box of doughnuts.  I loved the idea. It was cute and a little mischievous just like our elf Tim.
But I did not have a mostly empty box of doughnuts in my house.  What I did have were tiny elf sized doughnuts waiting to be made.  And by that I mean Cheerios!

Here is how I made some elf sized "doughnuts" with only on hand materials for Tim to devour tonight.


First I took a ramekin (any small dis would do) and sprinkled in a little bit icing sugar.  It doesnt take much so no need to fill your whole dish with sugar.

Just a bit of icing sugar
Next I took a paper towel and dampened it with some milk (I am sure water would work too, but I used milk)
Paper towel dampened with milk

Taking a Cheerio I pressed both sides into the damp paper towel.  Not too hard or the Cheerio will crush.

Moistening the Cheerios
Drop the Cheerio into your dish and cover in the sugar.
Easy peasy, lemon squeezy!

Taa-daa!!!!!
"Powdered doughnuts" done

I did this with hot coca mix as well.   And then again with some sprinkles. (For the sprinkles to stay on I had to mix a bit of the icing sugar with water and dip the Cheerios in that mixture first)

Then I melted a bit of chocolate and dipped  a few Cheerios into it.

I ended up with four varieties of Elf doughnuts for $0 in about 15 minutes.

Seriously, how cute are these?!
Adorable Elf doughnuts! 


Thursday, 12 December 2013

When is it "worth it"?

As many of you, my dear and gentle readers, know this last week has been exceptionally trying. During an unplanned trip across the country I heard from a few people that I was doing a disservice by not devoting more than the three days to the excursion.

When speaking with a well meaning friend about my plans she, too, was unpleasantly surprised at the short duration of my stay and asked me why I had made plans the way I did.  Among many reasons was that our family budget could not accommodate for That Guy to miss more than two days of work and for me to miss more than one. She said "Oh, but Rylan it would be so worth it."

I don't disagree with this woman at all.  It would have been totally worth it. But that changes nothing. It got me thinking about all the times I have heard sentiments like this in the past and how misguided many of these well meaning people are.

Let's pretend, for example, that I get a phone call from a high end car dealership.
The imagined conversation would go something like this
"Hello Frugal Blog Writer this is Henry from Super Expensive Cars" (I'm the Frugal Blog Writer, of course)
"Ah, Henry.  How are you today?"
"Very well, Frugal Blog Writer.  And I will be better still once I tell you about the offer I called to make you!"
"Go on, Henry.  I am listening."
"I have available right here in my showroom a brand new, fully loaded, fancy pants Ferrari!" (I imagine people who own - or sell- fancy cars like to call them "fancy pants" cars)
"ohhhhh"
"And it can be yours for ONLY $10,000 cash!!!!!!"
"Wow, thats a very low price for a Ferrari.  But I don't have $10,000. So I will have to pass.  Good luck to you, sir. Have a nice day."
"But wait!!! This deal is once in a lifetime! It's totally worth it!" (Because in his haste to sell me this car he has dropped his assumed distinguished accent and has adopted a layman vocabulary)
"You're right, Henry.  It is totally worth it. But regardless of how worth it it is I still don't have $10,000.  In my change jar I have roughly $40 of unrolled change.... I could give you $40 for the car..??"
*Incredulous sputtering* "ARE YOU MAD?!!! I cannot do business with you any longer. Good day!" *Call disconnected*


You see, just because its a really great deal on the car doesn't get me any closer to affording it. If I spent every penny I had or even every penny that was available to me it leaves me with nothing.  Which means I have nothing with which to buy things my family needs (like groceries).  I couldn't very well go to the grocery store and expect the cashier to give me the food for free because, well the Ferrari was worth it now could I? Same goes for my mortgage company and the gas station.


A good deal is when the dollar value of an item is greater than the proposed price.  A good buy is based on a number of factors including your budget, future income projections and non monetary value the item or service would bring to your life.

When I have an amount of money available and many demands on that money I have to prioritize.  Your priorities are very personal and will be influenced by an array of things.

My personal priorities go as follows:
1. Safety
2. Debt
3. People
4. Things

What that means for me is that if at the end of the month I have $200 left I would choose to, say, replace balding tires on our car before making a nice lump sum payment on my student loans.  It also means that a birthday gift or much needed new socks would come before buying a TV.

So, gentle readers, Just because something is worth it does not mean you can afford it!

Tuesday, 10 December 2013

Quickest, easiest, cheapest Christmas gift yet

This years Christmas gift to everyone was so quick and easy to make and so inexpensive I almost feel bad.  Almost ;)

We decided to do welcome mats with a twist.  I had wanted to make the mats all pretty with the house number of each gift recipient on it. That Guy, being an avid gamer, was inspired by the ENTER key on our computer keyboard.  It was hard, but I had admit his idea was better than mine. 

First we had to find the mats.  I found some on the IKEA website, but couldnt be sure I could get to an IKEA soon enough (there is not one in our city or even any surrounding cities.  Going to IKEA is a day trip for us).  I found some on the Canadian Tire website that I was pretty happy with, but when I got to Canadian Tire all available mats were too dark in colour. Since I will be adding black spray paint they had to be a light colour to best contrast. Then we found exactly the right mat at..... Dollarama! For $2.50 I found just the right colour mat that was in stock and available. 
Just the right door mat

Next we took a piece of scrap cardboard that was headed to recycling and cut it to be the same size as our mat. 

We printed the word Enter in the font we liked best and taped it to the cardboard

"Enter"


Because I lack any and all artistic ability I had That Guy cut the word in the cardboard along with the lines that would suggest a 3D key. He did this with an Xacto knife.

All cut out

Then we took the template and the mat outside and spray painted the negative image.  I used a heavy duty black Rust-oleum product for this purpose.
Spray paint is so much fun!!

Remove your template and let dry. 

Taa-daa!!


Sometimes I remember back to my pre-frugal days.  If someone had given me $3 and asked me to make a family Christmas gift I would have thought they were nuts.  Just goes to show its totally possible!!

Thursday, 5 December 2013

$2 DIY birthday gift

$2 DIY birthday gift

It certainly has been an emotional few days here- thank you to everyone for kind thoughts and words. Your prayers are much appreciated.  And a busy few days too! That Guy and I have made arrangements to fly out to be in attendance for my mothers Celebration of Life service.  Obviously we had been praying for her recovery so all arrangements have been made very last minute.    But since I am going all the way there I thought it would be wise for me to bring all the Christmas gifts with me which I would have otherwise had to ship.  Only problem? They were not all done.

This is actually a birthday gift I made for my nephew who will be turning 3 on New Years Eve- he's so awesome everyone lights fireworks on his birthday! :)

I decided to make him a felt fishing set.

I made him six magnetic fish, one magnetic fishing pole and a length of blue fabric for the water.

For this project I used:
- scarps of craft felt in a variety of colours - on hand
this sites fish template
- 2 packages of round magnets - $1 each package = $2
- hot glue gun and sticks
- scissors
- wooden dowel - on hand
- length of kitchen twine - on hand
- piece of blue fabric - on hand
- fabric paint - on hand


First I started by cutting out the fish template then using the template to cut the craft felt.  Be sure to cut two of the body pieces.  I did this by folding over my felt so I only had to make the cut once.

Fish template
 Still using the template I cut the top fin, bottom fin, tail detail and the "mouth".  The mouth is not on the fish template but I just cut a simple heart shape.
All the fishy bits
 Brightly coloured fish all dry fit together to make sure I had all my pieces before I started with the hot glue.
Love the fun colours
 One of your body pieces will become the "top".  To that glue the tail detail then set aside.  To the bottom glue your fins and mouth.
All glued down
 Next, using hot glue, add the magnet to the center of the bottom body piece.  The magnets I bought at the dollar store had one side that reacted to another magnet and one side that did not.   The non reacting side is the one I glued. The "active" side is up.    The first attempt at these had me stuff a small amount of polyester fiberfill inside the body at this stage to make him softer and puffier. However, my magnets were not strong enough to react to pull through the fiberfill and craft felt.  
Glue down your magnet
 So I just glued to top of the body to the bottom.  Then using black and white fabric paint I added the eyes.  This could just as easily be done with more craft felt but I am exceptionally terrible at cutting circles.
Let those eyes dry thoroughly
 Then I took my dowel and generously applied hot glue to the end.  While the glue was still hot I tightly wrapped kitchen twine around the dowel leaving a length hanging off the end.
kitchen twine + dowel = fishing rod
At the end of my loose twine I created a magnet sandwich with hot glue and the raw twine end right in the middle. I thought I was done with the fishing rod here.   But then I  tested it out.  Because of the way the magnet sandwich hung I was getting very little surface area of the active sides of the magnets, which means it was doing a less than stellar job at picking up those felt fish.  
magnet sandwich
 That Guy had the idea that I glue an additional magnet flat on the ends.  Worked great!
Another magnet glued to the end
 Taa-daa!!  Gift set all done! To wrap it I actually rolled everything up in the blue fabric and tied it at either end with ribbon, no need for wrapping paper.
finished gift
I sure hope my nephew enjoys this!

Monday, 2 December 2013

Things my mother taught me- A celebration of my mom

Last night my mom passed away.  I would like to take a moment to celebrate and remember the woman she was.

Things my mother taught me

Ask forgiveness
When I was little I was a real challenge of a child. I didn't mean to be bad, but I frustrated the patience out of my parents, teachers, coaches and babysitters alike.
Sometimes, if it was my mom who finally lost her temper with me that day, I was subject that night to a lesson my mother likely never knew she was teaching me.

After I had gone to bed, when the house was dark, my mom would tip toe into my bedroom. She would whisper me awake. Then she would ask me to forgive her for her temper. Of course I forgave her, she was my mom and forgiveness was given one second after it happened.  But by the asking my mom taught me that everyone should be treated with kindness, even if I didn't deserve it. My mom taught me that you're never too old, too smart or too important (she was all those things to me) to seek forgiveness.

Stand up for what is right, even if you're standing alone.
By example, this is a lesson my parents taught us kids every day. And I learned it easily.  However, as a teen I tired desperately to unlearn it. It was so embarrassing when I was a teenager to have my mom stand up to someone who stole a parking space. Or to a store manager not honoring their policies. Or to one of my friends if they treated me poorly.
At the time I wished she would just accept that things aren't perfect. Just put her head down and quietly accept what was going on.
But by standing up for what was right, even against my loud whispers of "Mom! Please!!"  she taught me about equality. It taught me that just because someone has a more expensive car does not make the parking spot theirs. That just because someone was higher up than me on the corporate ladder did not make it okay for them to be dishonest, sneaky, or hurtful.
It also taught me to hold myself to the same high standard as my mom. A few times, in the middle of doing something, my moms face would flash in my mind and I knew that if my mom saw me right then she would call me out.

Do the best you can with what you have
When I was just a little thing my dad went back to university for some additional classes.  Some of his classes ran past our bedtimes.  Being a single car family at the time it meant my mom had to bundle all three of us kids up, pack us in the car and drive (for what seemed like forever to me as a kid) to pick up my dad when his class was out.
This was an ideal situation for no one.
But shining out of these less than ideal car trips comes the memory of my mom, singing to us.  During these car rides we were free to request any song my mom knew, as many times as we wanted to hear it.  She would sing Jingle Bells, or Wheels on the Bus, or I'm a Little Teapot.

If things had worked out "ideally" in this situation and we had had two cars, or the class wasn't so late, or my parents could have found a sitter to stay at home with us I would not have this memory to cherish and hold dear.

My mother taught me to lift up your spirits and do the best you can with what you have- that's how joy happens.


Be joyful
My mom had this laugh. A laugh that carried and was even more identifiable at first listen than her voice. It was the kind of laugh that made other people take notice, and laugh too.

Every time I think of my mom laughing it makes me want to be certain that I laugh outwardly and openly as often as possible.  Because hearing someone laugh spreads joy.

The memory of my mom laughing is so dear to me that I actively try to do everything I can to be sure my kids can hear my laugh.  That they know my laugh. The active pursuit of joyfulness and laughter is something I could never thank my mom enough for.

Have strength and dignity
This was a lesson taught by example.  Never did anyone fight so many battles so hard with such strength of character and dignity. My mom had developed a skill for being reflective. Sometimes, I would call her when I was upset to vent a little and she would draw my attention to someone else's point of view.  She acknowledged that it was fine if I felt angry but I was discouraged from acting in anger or bitterness or jealousy.

My mom with Walter (3 years) and Audrey (15 days)

Please, gentle readers take a moment if you can and share this post.  Lets not let my mom, or her lessons, be forgotten.

Monday, 25 November 2013

Glitter photo fails

One day when browsing Pinterest, I saw this photo.
photo source
I loved it! It was magical and whimsical and glittery!!! I knew my kids would have a riot doing something like this and it would make a beautiful Christmas photo.  

I usually go to Wal-Mart for our photo needs and just bring along our own props.  But I knew there was no way Wal-Mart would be okay with that kind of glitter mess in their studios.  So I set to finding a photographer who would.  
And find one I did.  She even had her own home studio she said we could take the photos in (read: I wouldn't have to clean up the mess).   Her cost was $85.  Although that's a TON of money to us I figured the experience alone would be worth it for the kids and the photos would be an awesome added bonus.  So I booked her.  

Being a normal person this photographer did not have the pounds of glitter that would be needed to do a photo shoot like this.  Remember, gentle readers, glitter weighs next to nothing- so when I say we needed a couple pounds that's a whole lot of glitter.    Fortunately for me Hobby Lobby caters to people whos need for glitter exceeds that of normal people and sell the stuff in one pound tubs.

I bought two tubs.  

The evening before our schedule photo shoot That Guy decided to convince me that we didn't need to spend this $85.  He said that with it being so close to Christmas there were a multitude of places this money needed to go instead.  I agreed but I still really (really!) wanted these photos done. 
So That Guy says "Why don't we just take the photos here at home ourselves? If we cant get a decent shot we can always re-book with the photographer and the only thing lost is a couple of days."   I did not want to cancel and I felt like That Guy was way over blowing my photography skills (because even though the said "Why don't WE take the photos..." I knew it would be a me project) but more than that I did not want to fight with my husband about money.  Especially when I knew he was right.  So I agreed. 

And this, my dear and gentle readers, is why in a world of  DIY there are some of us who could still use the talents and skill sets of photographers.   


 I just jumped right in and tried to get both the kids to play with the glitter I had dumped ALL OVER our floor. Audrey thought she would make a better photographer than I, and kept trying for the camera. 


So I had to direct them to play in the glitter.  I did try to explain that I wanted them to toss up the glitter then look right at me.  In retrospect it may have been unfair to expect them to listen to me in a sea of glitter...
Pretty glitter!
 Then Audrey became a little stressed about the glitter sticking to her hands.  At least Walter was starting to get the idea.

Since Walter was so excited I decided to try and get some shots of just him to show Audrey both what I wanted and how much fun it could be.
Not the photo I had been hoping for. 
 This was probably the closest I came to getting the spirit of the photos I wanted.


And THIS is how bad the photos can be when you have no idea what you're doing.....
*shakes head*
 The next one is not too bad, but I forgot to direct him to smile which is something a professional would not have forgotten to do, I am sure.


 At least he looks happy in this one....

Then I thought it was time to reintroduce Audrey to the glitter.  But she's 2 and doesn't get the idea of not flapping ones hands during photos....

She was having fun though.  And although this shot warms my heart it doesn't really give the distant relatives an idea of how much shes grown and changed over the past year.
Laughing with glee
 So I changed my approach and sat her down.  Right away she smiled so nice for me.


Once again I thought I would push just a little further and asked her to play with the glitter.
*sigh* I am no good at timing
 And play in glitter she did.  But then she was so immersed in glitter that she forgot to look back up at me.  Even though I was calling and calling her name.


 Then tragedy struck and we got glitter in the ole eyeball.  Came right out but ruined the jovial moment.
Poor little eye
 Starting to loose all hope I figured I would throw the kids back together and just pray for something decent to happen.
Walter our of focus

Walter out of focus

Audrey looking like shes plotting something

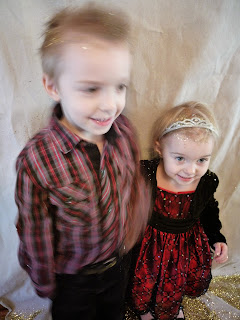
They both appear to have forgotten where I was

Just.... this....

Walter doing "weird smile" and Audrey seriously just
wanted to get going to her friends birthday.

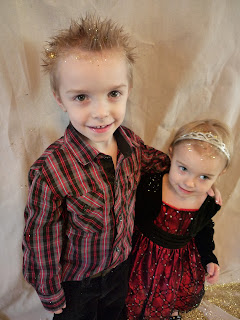
If Audrey wasnt out of focus I think I would have
just ended up using this photo...
 Walter asked me if he could kiss his sister for the photo.  I told him to ask her.  She said yes.  Then, apparently changed her mind at the last second resulting in this...

"Aww, you're kids are so cute!" will say no one who sees this blur.
 So we tried again. But now Audrey was stressed because she wanted to be the one doing the kissing, not the one being kissed.


 We tried one last time.....

And THAT is why its probably best if you use a professional photographer should you choose to try your hand at glitter photos.....