Search This Blog

Monday, 25 November 2013

Glitter photo fails

One day when browsing Pinterest, I saw this photo.
photo source
I loved it! It was magical and whimsical and glittery!!! I knew my kids would have a riot doing something like this and it would make a beautiful Christmas photo.  

I usually go to Wal-Mart for our photo needs and just bring along our own props.  But I knew there was no way Wal-Mart would be okay with that kind of glitter mess in their studios.  So I set to finding a photographer who would.  
And find one I did.  She even had her own home studio she said we could take the photos in (read: I wouldn't have to clean up the mess).   Her cost was $85.  Although that's a TON of money to us I figured the experience alone would be worth it for the kids and the photos would be an awesome added bonus.  So I booked her.  

Being a normal person this photographer did not have the pounds of glitter that would be needed to do a photo shoot like this.  Remember, gentle readers, glitter weighs next to nothing- so when I say we needed a couple pounds that's a whole lot of glitter.    Fortunately for me Hobby Lobby caters to people whos need for glitter exceeds that of normal people and sell the stuff in one pound tubs.

I bought two tubs.  

The evening before our schedule photo shoot That Guy decided to convince me that we didn't need to spend this $85.  He said that with it being so close to Christmas there were a multitude of places this money needed to go instead.  I agreed but I still really (really!) wanted these photos done. 
So That Guy says "Why don't we just take the photos here at home ourselves? If we cant get a decent shot we can always re-book with the photographer and the only thing lost is a couple of days."   I did not want to cancel and I felt like That Guy was way over blowing my photography skills (because even though the said "Why don't WE take the photos..." I knew it would be a me project) but more than that I did not want to fight with my husband about money.  Especially when I knew he was right.  So I agreed. 

And this, my dear and gentle readers, is why in a world of  DIY there are some of us who could still use the talents and skill sets of photographers.   


 I just jumped right in and tried to get both the kids to play with the glitter I had dumped ALL OVER our floor. Audrey thought she would make a better photographer than I, and kept trying for the camera. 


So I had to direct them to play in the glitter.  I did try to explain that I wanted them to toss up the glitter then look right at me.  In retrospect it may have been unfair to expect them to listen to me in a sea of glitter...
Pretty glitter!
 Then Audrey became a little stressed about the glitter sticking to her hands.  At least Walter was starting to get the idea.

Since Walter was so excited I decided to try and get some shots of just him to show Audrey both what I wanted and how much fun it could be.
Not the photo I had been hoping for. 
 This was probably the closest I came to getting the spirit of the photos I wanted.


And THIS is how bad the photos can be when you have no idea what you're doing.....
*shakes head*
 The next one is not too bad, but I forgot to direct him to smile which is something a professional would not have forgotten to do, I am sure.


 At least he looks happy in this one....

Then I thought it was time to reintroduce Audrey to the glitter.  But she's 2 and doesn't get the idea of not flapping ones hands during photos....

She was having fun though.  And although this shot warms my heart it doesn't really give the distant relatives an idea of how much shes grown and changed over the past year.
Laughing with glee
 So I changed my approach and sat her down.  Right away she smiled so nice for me.


Once again I thought I would push just a little further and asked her to play with the glitter.
*sigh* I am no good at timing
 And play in glitter she did.  But then she was so immersed in glitter that she forgot to look back up at me.  Even though I was calling and calling her name.


 Then tragedy struck and we got glitter in the ole eyeball.  Came right out but ruined the jovial moment.
Poor little eye
 Starting to loose all hope I figured I would throw the kids back together and just pray for something decent to happen.
Walter our of focus

Walter out of focus

Audrey looking like shes plotting something

They both appear to have forgotten where I was

Just.... this....

Walter doing "weird smile" and Audrey seriously just
wanted to get going to her friends birthday.

If Audrey wasnt out of focus I think I would have
just ended up using this photo...
 Walter asked me if he could kiss his sister for the photo.  I told him to ask her.  She said yes.  Then, apparently changed her mind at the last second resulting in this...

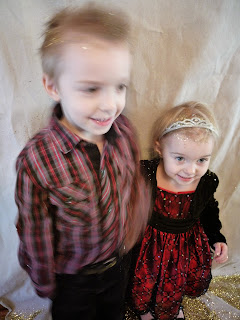
"Aww, you're kids are so cute!" will say no one who sees this blur.
 So we tried again. But now Audrey was stressed because she wanted to be the one doing the kissing, not the one being kissed.


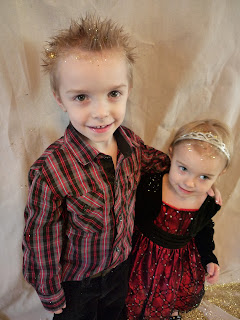
 We tried one last time.....

And THAT is why its probably best if you use a professional photographer should you choose to try your hand at glitter photos.....

Tuesday, 19 November 2013

Birthday gift for toddler girl (would also make a great baby shower gift) - $2.50

DIY growth chart gift for $2.50

This coming weekend is a crazy mess of wonderful activities. Among the planned goings on is the birthday party for a sweet two year old girl.

Gifts for two year olds are tough. Nothing too simplistic (they are not "babies" anymore) but nothing too intricate or with small or loose pieces (they still put many things in their mouths as a way to explore their world).

Originally my plan was to make her a hair clip bouquet. This little girls mom always has both her daughters dressed perfectly right down to matching hair accessories, so it seemed fitting.  But it didn't feel perfect.  It didn't feel exactly right.

So what's a gal to do when something just doesn't feel right in her craft life? Why, Pinterest-therapy of course!! And that is where I found this adorable blog on how to make an inexpensive growth chart.  I was drawn to the idea that the growth chart was removable (unlike tick marks inside the kitchen door frame) and could move if the family ever moved homes. This I liked! This was good! I was excited!

The above linked blog served as my inspiration but I did do a few things differently. Here is how I made a DIY growth chart gift for $2.50 in about an hour.

First I bought 2 yards (6ft) of jute webbing from Hobby Lobby for 99 cents a yard. If you, too, decide to take on this project you might find yourself in a craft supply store without any idea where to find jute webbing (in which case you would be exactly like me).   When I asked a sales associate for help she looked at me blankly.  If your sales associate does not know what "jute webbing" is just describe it as 3 1/2 inch wide burlap- type ribbon with red lines running down either side.   As soon as I said that the dear girl knew exactly what I was looking for and showed me where to find it.

When I got home I used my Cricut to cut out my numbers. I have to use my Cricut because I lack any and all artistic ability.  If you're like me but do not have access to a Cricut or similar cutting machine I did see some stencils last time I was at Dollar Tree that would work nicely for this purpose.

Why is the lighting so bad? Because I forgot to use the flash!
 Then I used the negative image of my numbers and, using a Sharpie marker, drew inside the image right onto the jute webbing.
Much better lighting
 Just colour in the number for a nice contrast look.
All coloured in
 I did numbers 1 through 6.  Although I bought 6 ft of jute webbing I started with the one ft mark right at the bottom.  This means two things. One: The chart does not have to be hung right at floor level and Two: It left me enough room at the top to customize it for the birthday girl.  I used a measuring tape and ruler to be sure of my spacing.
All my numbers drawn in.
Yes, it gets a little disorderly in my house when I'm crafting. 
 Then I added the tick marks at every inch with a slightly longer tick at the 1/2 ft marks.  The aforementioned blogger wrote in the numbers for each inch on her chart.  I was a personal fan of the clean effect of the tick marks only.
looking good!
 Again using my Cricut I cut out the little girls first name and stenciled that onto the top portion of the growth chart.  Just for fun I cut a heart from craft felt and adhered it with some hot glue.
I think its adorable. 
 In the other growth chart blog she added small paper tags on safety pins for the parents to mark the childs growth with.  I thought seriously about following suit but then decided against it.  In the end it would simply be unsightly when packaged to include 16 or 18 paper tags on safety pins.   Instead I opted to attach a Sharpie marker so the family could mark directly on the chart.
We had bought a package of 12 Sharpie makers last year for $6, so this one represents 50 cents of that cost.
I simply rolled up the chart and tied it with a ribbon.
All packaged up. 
 Taa-daa!!! I am so pleased with myself I think I will whip up two more for my nephews!

Thursday, 14 November 2013

A cutlery drawer makeover for $0

Am I the only one who can't stand the cutlery drawer? I mean, really cant stand it?

We had bought one of those standard plastic cutlery trays.  You know, the ones that are supposed to keep your drawers tidy? But they don't! They never have enough spots for all the different types of cutlery. From steak knives to plastic spoons for the kids, these trays just never remember all the other pieces outside of standard service.  So where do these "extra" types of cutlery go? Inevitably they wind up shoved in the drawer beside the tray. Because, here is another issue, they trays never fit the drawer!
So you neatly place the plastic spoons beside the tray in the morning as you empty the dishwasher.  But over the course of the day, with the drawer being opened and closed a bazillion times, they slip and slide until most of what you're looking for is under the tray.

Then you find yourself thinking cuss words at a cutlery drawer and realize something has to change!
At least that's where I was at a few days ago.

Back at the end of September my parents had gifted That Guy and I a new dishwasher for our seventh wedding anniversary. As we were unpacking the dishwasher I noticed some strips of hyper pressured paper. They were just a "waste" packing material but they were calling to me. They resembled pieces of wood even though I knew they were paper.  That Guy was not thrilled when I announced "I bet I could use these for something someday" and stored them in our basement already filling up with so many other such items.
But now I actually have used them for something! They were perfect for this drawer makeover.


To begin I think its important that I show you, gentle readers, just what I meant about my drawer disaster.
This is a terrible cutlery drawer. 
So That Guy and I took out everything from the drawer and figured out how many spots we really needed and what was important to us. Like having the steak knives at the back of the drawer and the plastic kids cutlery easily accessible at the front.

Empty drawer and hyper compressed paper packing material.
Of course this would work just as well with wood. 
 Then we drew out a couple of arrangement options inside the drawer to see what we liked best.
One of the design options
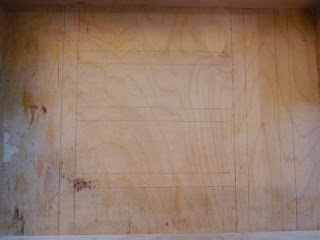
Then, easy peasy lemon squeezy, we cut the paper packing material and using liquid nails glued them in place according to the design we liked best.


 Next I took some on hand shelf liner and cut it to fit our spaces.  Yes, I had shelf liner on hand. I buy it buy the roll from the dollar store and use it when I make hair clips for babies so they grip better. I still had plenty on the roll.
Shelf liner in
 Then I put all the cutlery back in the drawer and...Taa-daa!!!!
So tidy and lovely
I smiled every time I opened the drawer that day.  Sometimes I find thrills in strange places ;)

Thursday, 7 November 2013

An intimate post about my....deodorant

Here is my morning routine:
- be woken up by a five year old who is very anxious to start the day
- wash my face
- brush my teeth
- moisturize my face
- apply body lotion
- put on deodorant
- get dressed
- put on make up
- quickly do hair, usually involving some hair spray or anti frizz serum
- spritz some sort of body spray
- leave my bedroom for the first time that morning

Here is the thing to notice about the above: if you count "put on make up" as only one act (and we certainly know it is not) I have touched man made products or chemicals to my skin eight times before I even leave my bedroom!

Recently a friend started asking some questions about green alternatives to deodorant. Now, I love green options as much as the next gal, but lets be honest gentle readers - they are usually very expensive.  So I started doing a bit of research.
The internet abounds with free recipes to make your own deodorant, both green or traditional.  But much of the time I did not have the items I needed for the recipe on hand, like clay.

So I narrowed my search to things I would have in my house. I found some recommendations for baking soda or cornstarch. So I tried them.  Perhaps I was using them wrong but I was not happy with the result. Although the baking soda left me smelling fine I had yucky white bits under my arms. Same happened with corn starch. This time of year the appearance of my under arms isnt really a big deal since its too cold out for sleeveless tops.  But if I am going to make a switch from chemical deodorant to natural I wanted it to be a lasting change - even in the summer months.

When I first came to the suggestion of using a lemon I passed it by.  I figured the juice from the lemon would start to smell "bad" during the course of the day and that would negate any deodorant properties it might offer.  But in continuing my search, lemons kept popping up.

I decided that lemons are certainly cost effective and something I had immediately on hand. In other words, it was worth a shot.

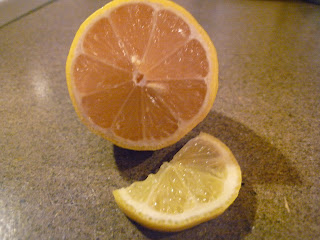
So one morning I got up and did my morning routine, minus the deodorant. I came downstairs to the kitchen and cut myself a slice of lemon.
my lemon slice
Then, feeling like a total goof standing in the kitchen with my hand up my shirt, I wiped a lemon slice under my arms.  The feeling of goofiness was not at all reduced when Walter asked if he could eat some lemon too and I had to explain that I wasn't eating the lemon but rubbing it on my skin.

However, the lemon works AWESOME!! I do not smell like bad lemon juice. I don't even smell like lemon (which is kinda too bad because I really like the smell of lemons). I just don't smell.   Like anything at all.  I don;t have weird residue under my arms either, as I did with the baking soda and cornstarch.

This is a mad cheap, readily available and totally green option that I have wholeheartedly switched to.
So why not save yourself some money, some chemical exposure and some white residue and try out lemons?

Monday, 4 November 2013

Be kind. No exceptions. Random acts of kindness on a budget

Friday, November 1st was Random Acts of Kindness day. And, gentle readers, upon hearing this I was less than kind.  The very first thought that popped into my head was "Is it really a random act of kindness if the calendar has to tell you to do it?"
At least my heart had the decency to be immediately ashamed.  As my cheeks burned I remembered that the important part wasn't the "random" bit, but the "kindness" bit.

That Guy and I try very hard to instill a servants heart into our children (and obviously I need to remind myself of these lessons too) but I felt like it would be very fitting for us to make the very best of November 1st- all on a very tight budget.

As many of you know right now I run a home daycare. November first was a regular care day, so all our acts of kindness had to happen outside regular business hours.

For Walters birthday his loving aunts has sent him a gift card for Toys R Us and I had promised him he could go spend it tonight.  Since we were going to be there anyways I thought I would focus our acts in that part of town.

Here is what we did.

First, Walter and I used some Sharpie Paint markers and decorated some stones.  We thought these would bring a smile to the face of anyone who found them.
Our decorated stones

"You are enough"

"You are awesome"

"Be joyful"

"sparkle" and "shine"
 We took our stones and left them, one by one, on the sidewalk during a walk to our doctors office.  We took a different route there and back to offer more people the opportunity to find the stones.
We were on the way to the doctors office to bring some books and puzzles for the kids section of their waiting room.
Some of the books we brought for the waiting room.

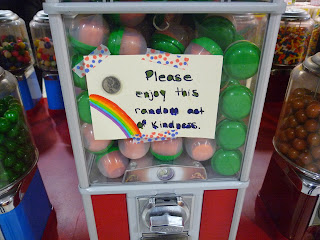
Walter and I wrote on some note cards and, using double sided tape, attached a quarter to each card. We made $2 worth of cards, eight in total.  Then we went to the mall and taped them to some gumball machines.

"Please enjoy this random act of kindness"
 As we were walking out of the mall two small children saw these cards and were SO excited when their mom said they could each have a gumball.  Hearing their joy had Walter literally skipping out of the mall.  This was, far and away, his favorite act of kindness.

We also popped into Toys R Us (so Walter could do some birthday browsing) and I left some diapers and wipes on the baby change station.  Diapers are expensive and this was only possible for us because Audrey was potty trained before she finished her last box of diapers.
"You're doing a great job! Enjoy this random act of kindness"

The total monetary cost to us here came out to $2.  The benefit to someone else, well I will never know.  The soothing of my own heart and watching the joy of giving beam through on my sons face.... worth more than money.