Search This Blog

Monday, 31 March 2014

30 Pearls of Wisdom for My Daughter

I became aware of this blog through social media, 60 Little Tips That Can Change A Girls Life. "Wow, change a life, this is going to be powerful stuff" I thought as I started reading it. And although I think it makes some good points (make your own coffee and tea, eat breakfast, take bubble baths) they certainly did not change my life.  But my real issue with this blog was that it suggested itself to be a guide on how to be a woman. And in that I found it very lacking.  As the mother of a tiny, intelligent, fierce woman-to-be (she is just two years old) I wouldn't want my daughter to see a blog like this and assume that's all there was to being a woman -boob tape, white nail polish and the life changing powers of accessories.

So I thought I would pen my own version. Still fun, like the original, but with a better grasp on the idea that women can be more than skin deep.

30 Pearls of Wisdom For My Daughter
My daughter

1. Learn to read music. Math and music are international languages.
2. Yes you can use power tools. Go on, try it. It's fun!
3. Take advantage of as many learning opportunities as you can. Learning is neither beneath you nor beyond      you.
4. Have at least one specialty you can make in the kitchen to impress a guest.  (I'm a kitchen disaster but can     make an awesome soft pretzel.)
5. A businesses deal can be made or ruined by the quality of a handshake.  Be strong and confident - in             handshakes and in business.
6. You teach people how to treat you. Own that responsibility.
7. Read the book before you see the movie.
8. Have faith. In God, in science, in people, in love. In any of those or in all of them, just have faith.
9. Stretch. Your body, your mind. It's good for you.
10. Save your money.
11. Spend some money on fun things.
12. Buy things second hand. The minute you open a new item it becomes used anyway.
13. Get the very best sheets you can afford. No one has ever regretted a great nights sleep.
14. Dress in a way that ensures I cannot see your undergarments or their straps. This is not about sexuality            its about care. Wear all the short shorts and tank tops that make you feel comfortable and happy, but             spend time on yourself planning the best undergarments (strapless bra?) for your outfit. Dressing with             care makes a statement that you care about you and others should too.
15. Entitlement is one of the least attractive character qualities.
16. Don't spit in public. It's gross- plain and simple.
17. Always have at least one house plant. If nothing else it's good for the heart to care for another living               thing.
18. Remember grammar.  It's not hard. You didn't "seen" an item on sale last week, you "saw" it.  When             using "your", first ask yourself "could I say YOU ARE and have the statement remain relevant?" If yes,           use "you're" instead.
19.  Allow love to happen.
20. Once it does, once someone is in that special place in your heart guard that place.  Let no one else into          that space.   More than any one thing that's the secret to a happy, lasting love.
21. Change your own oil, cut your own grass and make your own lunch.  Yes, you can.
22.  Don't say "I don't have time for that".  You have EXACTLY as much time every day as someone who          does "that".  Choosing to use your time differently is perfectly appropriate, but saying you don't have              time to do what someone else does suggests that how you spend your hours is some how superior. It is        not. It's simply different.
23. "This sucks" and  "That blows" are not wise uses of your words. Take a second to think about the                  suggestion being made of what is being sucked or blown.  Now you can understand why it doesn't                show you in the best light to be overheard saying that in a work place, for example.
24.  If someone comes to pick you up, have them come to the door to get you. You are worth that much              effort.
25. When hosting a dinner party, allow guests to bring something. Bread, salad or a special condiment are           great options.
26. Likewise, when arriving at a dinner party do not do so empty handed. A small hostess gift is always               appreciated and does not have to be expensive.
27. Should you get married, do not give charitable donations at guest favours. That is not true charity.                 "Thanks for all the gifts guys, as a show of thanks I gave the money I would have spent to honour you on       something else.  But thanks again for getting me all those nice things"- see what I mean? True charity is           "We are so grateful you all came out to celebrate this day with us.  We have what we need.  Instead of         gifts for us please feel free to donate to a charity.  Your small guest favours to thank you for coming are        on the table in front of you. Enjoy!" Giving away someone else's gift is not charity.
28. Give grace. Forgive yourself.  Forgive others. Forgive with a whole and ready heart. Allow yourself and       others the space to make some mistakes free of judgement or condemnation.
29. Smile.  A lot. Its costs nothing, takes no time and you cannot know what it might mean to the person you       are smiling at.
30. Be kind.  To cashiers who do their jobs perfectly (even though you don't notice when they do) and to the      ones that accidentally short change you.  To the staff  at the drive through restaurant who got your order        wrong.  To the guy on the phone when you call to complain about your wireless bill. To the waiter and          the airline stewardess and the nurse. Be kind to your teachers, and the postal workers and police officers.      Be kind to your friends.  Kindness isn't about being a doormat.   But speak gently, use words thoughtfully      and give them grace.  It's that simple.

Monday, 24 March 2014

DIY framed board game/art

Even though the temperature outside wants to keep it a secret, spring is coming. As is spring cleaning. In an effort to get a head start I have been trying to slowly purge our basement of stuff and things that have accumulated down there. I have been doing pretty well; getting rid something every day. 

While I was cleaning up down there the other day I came across our collection of board games. I remember thinking "Oh thats where Candyland is. Why don't we play this anymore? The kids loved it." The simple answer is because that game, among others, was being stored in our cluttered basement, all but forgotten about. 

So I decided to do something about that.  The Candyland game board in particular is a riot of fun colours and images. Just the sort of thing that would look adorable in our playroom/ daycare space. I thought if I could take the game board out of the box and hang it on the wall like a piece of art we could appreciate the fun game board while also helping us remember to play it more often. 

I started by looking for a picture frame in which to hang the game board. But game boards are not standard sizes and I couldn't find anything that was going to fit.  Custom framing? Not for hundreds of dollars, thankyouverymuch!  I am a moderately intelligent, reasonably capable woman... I could make my OWN frame. Right? Right?........

Off to the hardware store I ventured and bought a 7ft length of molding for $4.50. 

After carefully measuring (measure twice, cut once!) I cut the molding at 45 degree angles. 

Measuring against the game board.
 On most board games there is a thin black boarder (as you will notice in the photo above) that  outlines the actual game board.  When you take your measurements take them from the game board itself so you can use that black boarder space to adhere the board to your frame in a later step.

Cutting at 45 degrees

Cut.  Next measurement. 
 Dry fit your pieces together to be sure that they fit and work with your board.
Starting to look like a frame
 Quickly sand the edges.
Those man hands belong to That Guy who very sweetly
helped me with this project. They are not my hands ;)
 Using some liquid nails and a staple gun (seriously, how fun are staple guns?!) attach the frame pieces.
Liquid nails and my staple gun
 Liquid nails went between each join.  After the liquid nails was dry-ish I flipped the frame over and stapled the back of the frame across the joins as shown below.
Stapled
 Next I dug out a piece of cardboard from our basement to use as a frame backing.
Cardboard backing
And cut it to fit slightly larger than the frame opening.
Cut to size
 I ran a bead of liquid nails along the black boarder of the game board and pressed it onto the frame. Using my nail gun I attached the cardboard back to the frame
Nice snug game board
 Two quick coats of white paint on the frame and it was done!
Painters tape is the friend of a sloppy painter (me)

Notched out and attached hanging hardware and we were pretty much done.
Hanging hardware

I thought I should show you, my gentle readers, where I hung my fun new art.  I replaced this art... and by "art" I mean a piece of scrapbook paper in a dollar store frame.  It was too small for the wall and frankly never intended to be permanent decor.
too small art
 What a difference with the Candyland board there instead.
The colours are so fun
Now Walter and Audrey can play anytime. We can just take it down from the wall and play as is, in the frame.  When we are done it just gets hung back up. Tidy and pretty!

Happy kids
Taa-daa!

Monday, 17 March 2014

DIY chalk paint piano make over

Sometimes, as a daycare provider, you walk into the daycare space arms loaded down with plates of food for lunch time and you know something naughty has happened. You can feel the guilty tension. And although you still cannot see what the tribe of children has done, you brace yourself for it.

That was me on Friday. As I carried plates of lunch out of the kitchen where I had been preparing it, into the dining room where the kids eat.

Those little faces looked guilty as they huddled around my piano. Their eyes a little too bright as they tried to tell me nothing was going on.  Then I saw it. One of the children had unscrewed one of the knobs used to lift the cover over the keys.  Inside the knob, of course, was a screw.  And on the sides of my piano there were scratches.  So many scratches.  Too many to have come from one child with one screw.  Closer inspection revealed that EACH child had grabbed something (a pen, the edge of a Batman figurines wings, a plastic fork) and they were all scratching my piano.  Yup, all of them.  They had done such a stellar job of scratching that there was a tiny layer of sawdust at their feet.
You can see some minor scratches on the front  from here.
Most damage was done on the sides. 

I was less than thrilled. MUCH less.

We had got our piano free last summer from someone who was moving and no longer had space for it.  It was pretty beat up in its old age.  I had known for a while that it needed a bit of a face lift, but I was not planning to tackle that project this past weekend.  Then The Great Piano Scratch of 2014 happened and I had to boost my timeline.

I told That Guy I would paint it. He said "You want to do brown like it is now, or should we paint it black?" I said "Actually I was thinking green..." That Guy looked at me.  His look did not communicate "You are sane and I think painting our piano green is a great idea".   I ignored his look.

I went down to Home Depot and bought myself a gallon of green paint.  This green colour was not selected at random.  I brought a scrap from the fabric I used to make our drapes and colour matched the green in the drapes.  I bought Glidden paint in flat.

I also bought Plaster of Paris and a tin of Minwax Paste Finishing Wax.   Total cost was less than $40.

When I got home I mixed:
                                       4 tbsp Plaster of Paris
                                       2 tbsp water
I mixed them together well in a bowl with an old fork.  I made sure all the lumps of POP were out.
Then I added that mixture to 2 Cups paint and again mixed well.

Next, I painted! Because I made a DIY version of chalk paint there was not need for me to stand or prep the piano before I started painting. Awesome time saver.
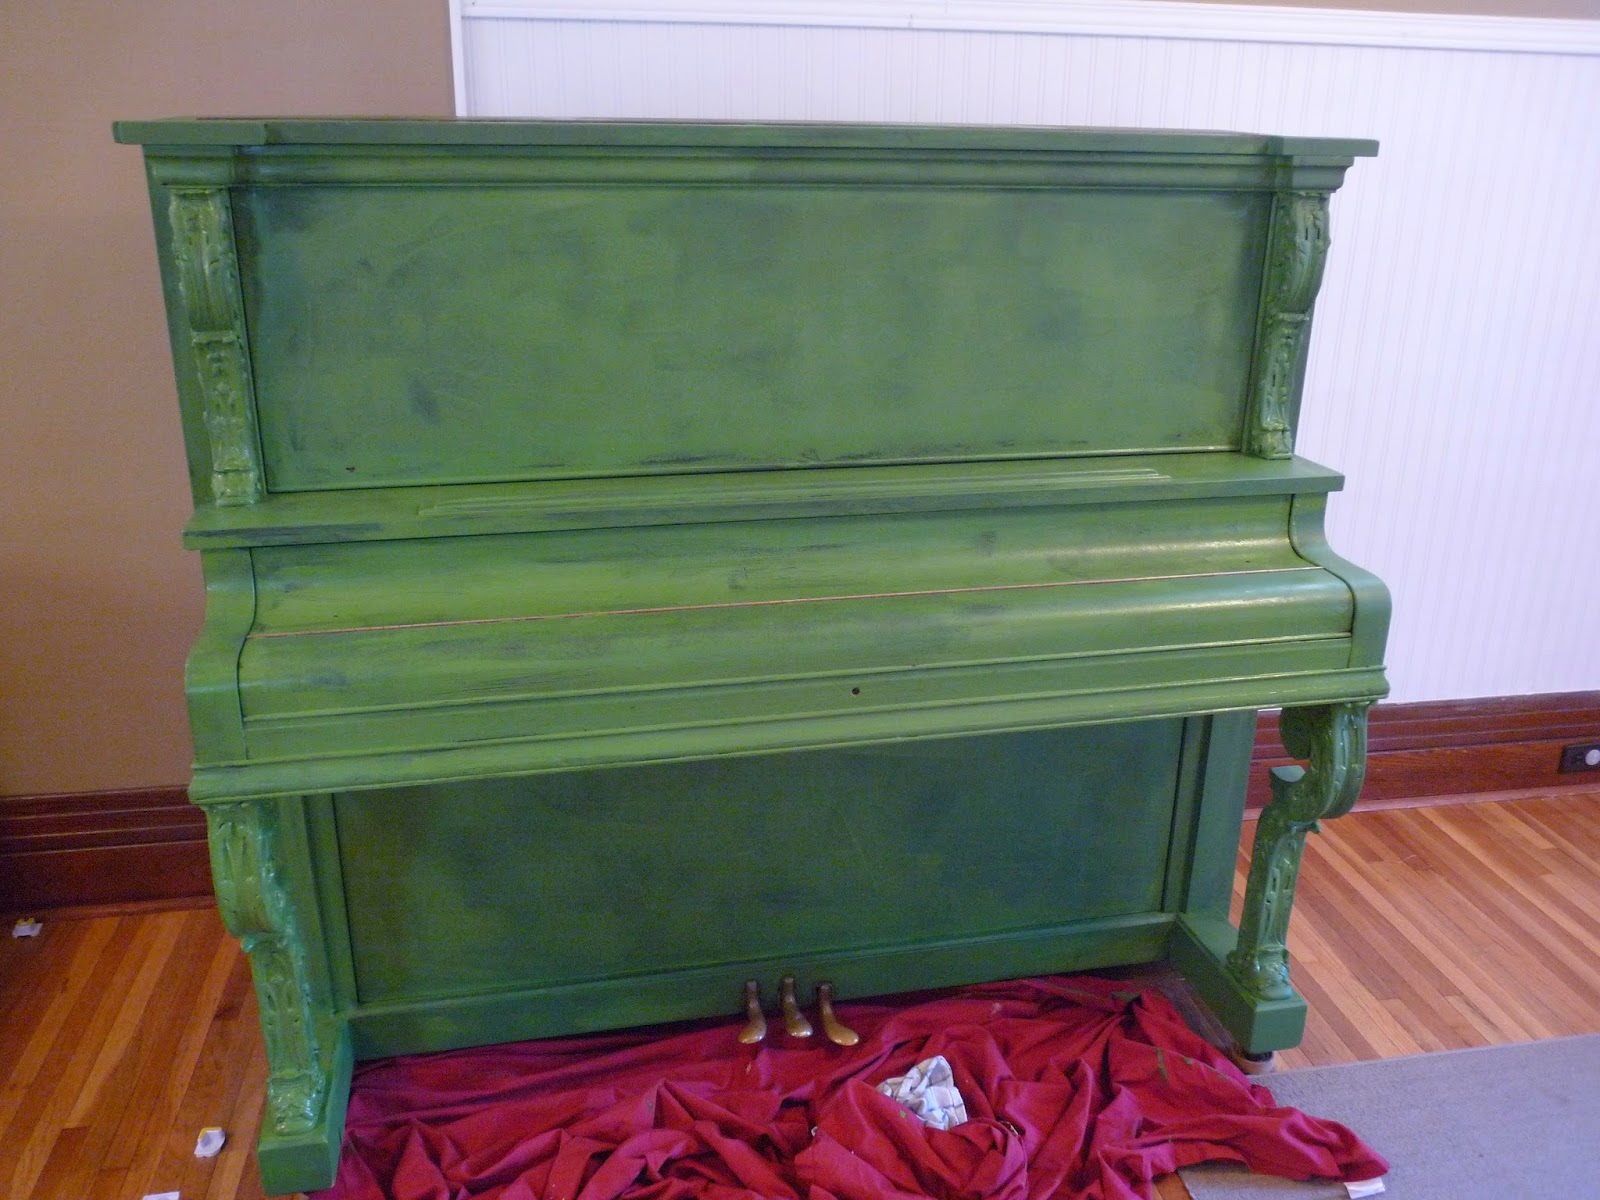
Piano after first coat of chalk paint
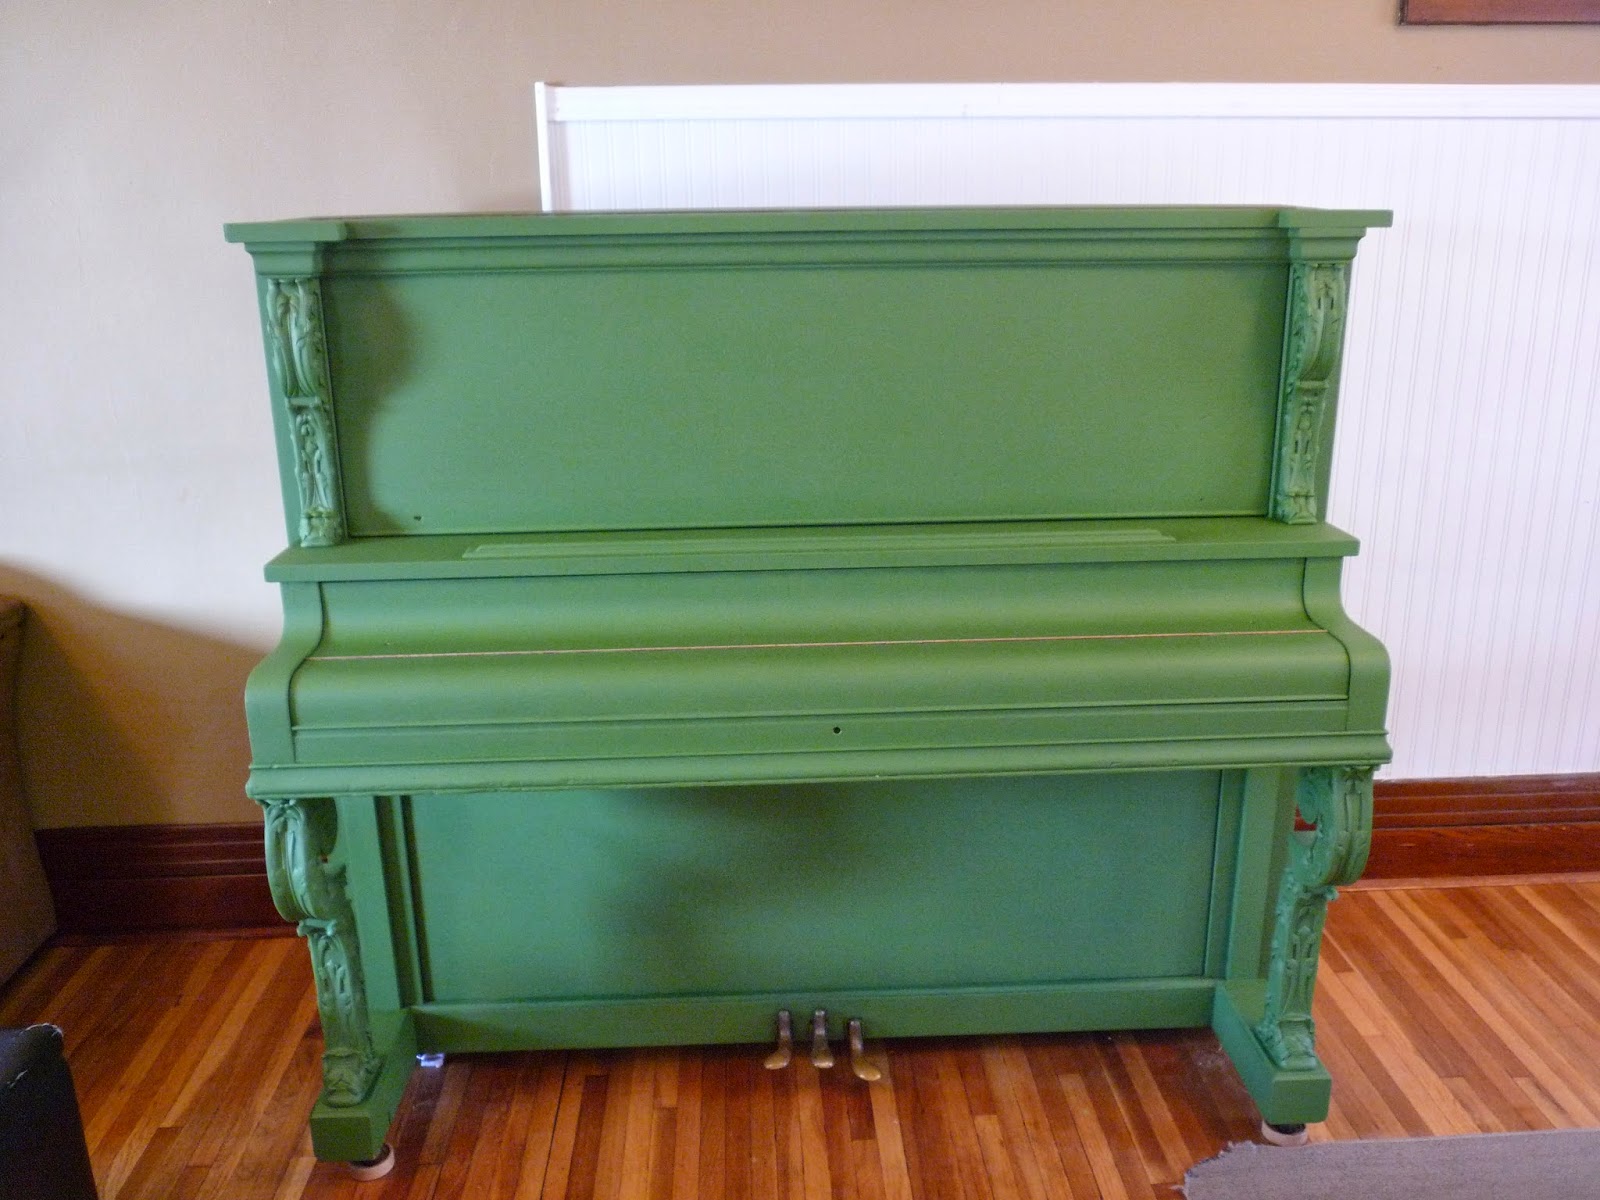
 Adding the Plaster of Paris to the paint also helps the paint dry quickly.  Once I was done painting the whole piano with the first coat it was ready for the second coat.  I was really loving how my tired old piano was looking by this point.
Happy, refreshed piano.
 I did not want to ignore the fact that the piano is obviously old. I was not trying to make my piano look new again. I was more trying to liven it back up.  So I decided lightly distressing the paint would be a good choice. Fortunately with chalk paint sanding/distressing is easy peasy. I took some 120 grit sandpaper and lightly sanded some of the edges on the piano.
Lightly sanded
 I wiped the piano down with a dry cloth and was ready to apply my finishing wax.  Finishing wax is nice because it protects your wood.  It gives a barrier between the wood and every day wear and tear. If you distressed your piece like I did the finishing wax will also seal the exposed wood and paint together which will help to resist paint flaking from those spots.  It also adds a slight shine which is just so pretty and finished looking.
Finishing wax
 A little wax goes a long way.  When applying I encourage you to use an old t-shirt or jersey knit rag.  Sacrifice a t shirt if you must but do not buy a brand new one for this or your project will be covered in lint. (Guess how I know).   Wipe the wax on in circular motion.  Let the wax soak into the wood for about 30 minutes. Then, using a different clean part of the sacrificed shirt buff the surface. The buffing will create a really nice light shine to the piece.
Wax on, wax off
 Then stand back and admire your rather bold statement piece. I kind of love it.  That Guy is coming around. Slowly.
Taa - daa!!!

Thursday, 13 March 2014

Fire Safety at our house

Being safe and managing risks is just part of my personality. That part may have become a *little* exaggerated when I became a parent.  When I added being a child care provider to the mix, safety became paramount.

With daylight savings time just passed I am sure you all remembered to check or change the batteries in your smoke detectors. It got me thinking that I should share with you our fire safety routine.

That Guy and I had started with using the typical map of the house and identifying the nearest exits with the kids.  But, although we went over and over it, the actual concept wasn't really sinking in.  Likely because seeing something on paper does not impress its importance on a very young child.

So I switched gears.  On the 2nd of every month (that's the day we picked years ago, you of course could choose any day) instead of pulling out a floor plan of our house we pull out a cardboard box.  On this box, with the kids crayons, I drew flames.

I take the box, and while the kids are immersed in their own activities I place it someplace in the house to represent a fire hazard.

Fire hazard on the stairs!
Yes, you can be impressed with my flame colouring skills. 

Fire hazard blocking the front door!

Fire hazard in the hallway by the office!
Then I activate the smoke alarm. The kids try to leave the house, but if the fire hazard is in the way they must remember and practice alternate routes.   Knowing that there ARE alternate routes may not be enough during an emergency when habit reigns. If a child has only physically practiced one safety escape they may panic if that one if blocked during a real fire.

At first, sounding the alarm scared the children. But it was important to me that the sound of the alarm did not terrify them into non movement.  So we have kept at it every month.  The sounds is still rare enough to get their immediate attention while being familiar enough to keep panic at bay.

With our escape route we practice the old "Stop Drop and Roll", feeling for heat on a closed door, or blocking incoming smoke for seeping under a door if we are trapped and must await rescue. We practice calling for help. All too often, young children are scared by fires and tend to hide, even from the fire rescue team. Be clear that an engaged fire is very loud and they will need to shout! We also practice our safe meeting places out of the house and how to interact with first responders to help them do their jobs.

When the practice is over our box goes back to its home in the basement to await next months exciting drill.

Hopefully this blog will inspire you to talk your family and any children in your care about fire safety and get practicing!

Monday, 10 March 2014

DIY birthday gift for girl- under $5

Good morning, gentle readers!!
I have not forgotten you.  The passing of my mother has affected me in some unexpected ways.  That is why I stepped away from blogging for the past month.  I just needed a chance for things to level out a bit.
I am now in the place of a better outlook and am happy to be back at blogging.

This morning I am sharing with you my DIY birthday gift for a little girl. This gift ended up costing me less than $5, and I have to say I am pretty happy with my results.

This particular little girl is having a Frozen themed birthday party. I wanted to gift her something in line with her theme without it being a licensed Frozen item. I decided I would make her an indoor snowball kit (I did get the okay from her mom that she would be allowed to play with these inside).

There are a few approaches online about how to make indoor snowballs but none of them really spoke to me. I had the idea to use white Styrofoam craft balls.  But when I picked them up they were too light. They are not made for tossing and I believe that would take a lot of the fun out of an indoor snowball fight.  But you know what's great for throwing while also being light and soft enough not to hurt if it hits someone? Ball pit balls!!!

I only needed 24 snowballs, so originally I only wanted to buy 24 or 25 ball pit balls. But I quickly discovered that the cost of 25 was almost the same cost as buying 100.  So I bought a bag of 100 balls for $12.  That means I can use those for four separate snowball gifts. Making the cost of balls for each gift $3. I also hit up the dollar store for a bright pink bucket (this particular little girl is a pretty big fan of pink) to put them all in; the bucket was $1.25.


To begin with I had to sand the balls. If I had not sanded them the paint would have had difficulty adhering to the plastic and likely would have flaked off over time.  By lightly sanding the shiny surface off the balls I increased the paint adhesion.
The ball on the left was taken directly out of the bag.
The ball on the right was lightly sanded
 Next I painted the balls white with acrylic craft paint. You want nice coverage but don't stress too much about it.  The nature of a ball insists that one point of the balls will be in contact with your drying surface, and this usually means one spot of paint that does not dry well or pulls off.  Not to worry about that, just do the best you can. I also added a coat of Mod Podge to the balls after the three coats of paint.  I did this as an added layer of protection against scratching or flaking of the paint.

Balls after three coats of white paint.
As they were drying it was time to get my "snow" coating ready.  Originally my plan was to buy fake snow. But in March that gets hard to find.  I even scoured online and wasn't finding any fluffy stuff, mostly just spray on snow intended for window displays.   Then I read about someone who used paper towels for her faux snow.  At first I thought she had wrapped her balls in paper towels and thought it would be so ugly.   But she had actually run her paper towels through the food processor. 
When I tried it in our spice grinder it came out like a dream! I was so very happy with the results!

I needed about half a sheet of paper towel per ball.   I ripped up the towel into roughly thumb sized pieces.  The pieces have to be small enough for good shredding but do not need to be a uniform shape.  
roughly thumb sized pieces
Ripping up the paper towel was definitely the most time consuming part of the gift. Feel free to enlist small helpers (or dinner guests who are too polite to refuse).

My sweet helpers


Put the lid on your spice grinder and let it run for about 10-15 seconds.  When you open it up, Volia!! Perfect, beautiful, fluffy, cheap fake snow!!!
Looks exactly like I had been hoping!
 Next, I did another coat of Mod Podge on the balls and just pushed my "snow" on with my hands.  
Okay, its true, I added a sprinkle (or two) of glitter to the fake snow before I glued it to the balls. Not everyone loves glitter but I really feel like it was perfect for this gift.
Adding the "snow" gets a bit messy and you will have paper stuck to your palms and fingers while you work.  Fret not, it all washes off easy peasy.

Here is my finished product.  Looks pretty snow- like if you ask me! Taa-daa!!
Non- melting, indoor snowballs!