He is an astronaut!
We did this costume for $13 total. $12 of which was for duct tape (10 rolls of white, one of blue and one of red) and $1 for a cheap plastic ball. All items were found at the dollar store. I almost paid $6/roll for duct tape (before I knew how many rolls I needed) when a friend said "I think I've seen white duct tape at the dollar store....." Thank goodness she said that!
I had seen this idea online somewhere, but all I was given insofar as a "how-to" was one photo and a warning not to use fabric paint- duct tape really is best.
Since I am thrilled with the results I think you, my dear and gentle readers, deserve a step by step how to for this DIY astronaut costume.
I used:
duct tape (as mentioned above)- $12
Walters old snowsuit - on hand
Walters old snow boots - on hand
Worn out childrens gardening gloves - on hand
Plastic ball - $1
Newspaper for paper mache - on hand
For the record, although this is technically for the pageant, this is the costume Walter will be wearing for Halloween. Since it's done I'm feeling pretty happy about being proactive. :)
I started off with Walters old snowsuit from last year. It was just a touch too small for this year and the knees of the snow pants had small tears from last years play. If you don't have old snowsuits to start with you could try a second hand store. However, I really believe your best bet is to check and see if you live in a Frugal Mommy area and reach out through that resource first. This is not the first time I have mentioned Frugal Mommy, and I'm sure it wont be the last. It is a fabulous way to get rid of things you no longer have use for while finding things you need. Here is the link : www.frugalmommy.org.
First thing you will want to do with your snow suit is stuff it. I used towels. Make sure you stuff it firmly or the tape will cinch your suit.
 |
| jacket stuffed with towels |
You do not want to start at the wrist and wrap the tape in circles winding up the arm. It looks terrible that way - really, really terrible. Guess how I know that..... *le sigh*
 |
| see how awful the arm looks here? and how much better the torso looks? Strips are your friend! |
Once the coat is all done add any decals you wish. we chose to keep it fairly simple. That Guy made the Canadian flag from red and white duct tape and the NASA logo also from duct tape. Pretty impressive, right? I thought so too. :)
 |
| That Guy's handiwork is pretty impressive! |
 |
| pants |
Smile! The biggest part of the costume is done!!
This is not hard work, just lots of taping!
Next I covered Walters winter boots in duct tape. These boots still fit him fine (I wouldn't have him running around all night on Halloween in boots that are too small) but they were a second pair he had. To be clear, I bought them second hand, no special brand name but in decent shape and perfectly functional for our needs. Then the in-laws decided to buy him brand new licensed character boots with light up soles. Guess which boots got banished to the basement and never worn? Yup, the "boring" non light up ones I had bought him. So those are the ones I covered in tape to make into moon boots.
Nothing complicated about doing the boots at all. I didn't even add any decorative touches, just left the velcro closures outside of the tape.
 |
| Boots all taped up |
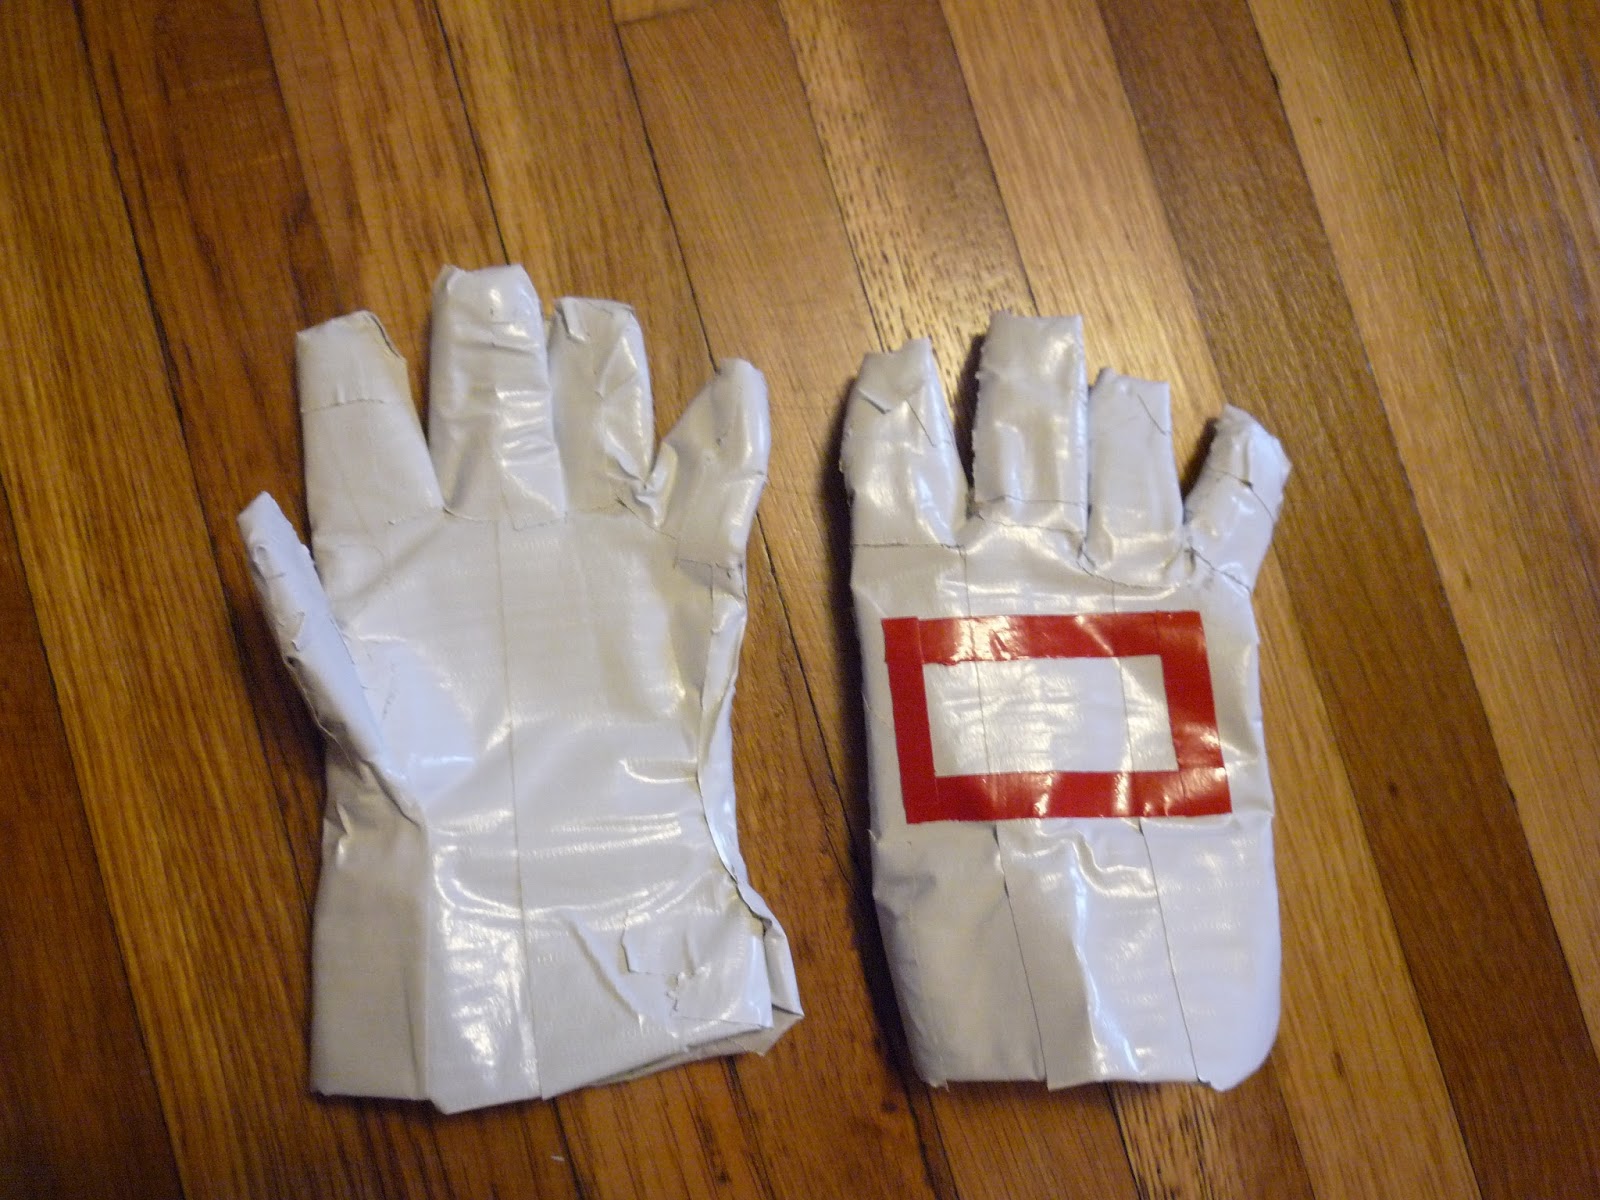 |
| gardening/ astronaut gloves |
Ah, the helmet! The last costume piece. I used a ball and paper mache for this. I did not want to use a balloon because I find balloons warp out of a perfectly round shape the larger they are inflated, and I needed something big enough for Walters head.
 |
| Covering the plastic ball |
Once the exterior finishes drying (inside the house) it will be time to cut the face opening. Using an Xacto knife just plunge it right in there. With care and concern for your personal safety of course. This will pop the ball inside rendering it useless.
 |
| That Guy cutting into the helmet for me |
 |
| face opening after ball is removed from the inside |
 |
| Cutting a neck opening- what NOT to do while its still even remotely damp |
I would still like to add some blue and red decals to the helmet, but I think you get the idea pretty well.
So there it is, a whole space suit costume for $13. And warm enough that he can actually wear it as is on Halloween night.....anyone else still resentful that their mermaid costume was totally ruined because your parents insisted you wear a winter coat under your seashell bra?? Astronaut costume will not have that problem!
 |
| Taa-daa!!! |
Brilliant, totally and absolutely brilliant. Thanks a lot for taking the time to post each step.
ReplyDeleteSpecial thanks for the helmet idea. So much bettter to use a ball than a balloon.
These pictures and step by step directions are fabulous! Thanks for sharing! Love the end look. :)
ReplyDeleteWonderful idea... Thank you for sharing this...
ReplyDeleteThank you for the step by step directions and pictures... Brilliant work ...
ReplyDeleteThanks a lot, just what i needed. Will definitely try this!!!
ReplyDeletethese suck
ReplyDeletesuper ugly!!
ReplyDeletei agree! it doesn't really tell you about strapping the white tape.
DeleteYou are rude and unkind. She did a wonderful job and I think it looks fantastic.
Deleteare u drunk or wat?
ReplyDelete#WierdAndUnpresentable
ReplyDeleteIf people want perfect they can buy a ready made dressing up suit this is PERFECT for school projects where teachers want to know you have made it yourself! Thank you - also from my niece;)
ReplyDelete