*Deep breath* LastweekIturned30. phew, yup, I said it - last Tuesday I turned 30. Then this past Saturday we attended a friends Halloween party. Although only days separated me from 29 and 30 I suddenly felt silly in those pop up Halloween costume shops looking at the tiny dresses made to be costumes for 19 year olds. And they might be adorable on a tiny 19 year old, in fact I sometimes wish I had worn these costumes when I was, in fact, a very fit 19 year old. But now I am 30 and have had two kids, mix in struggling with my own personal body image, and I feel the furthest thing from comfortable in something called a "sexy peacock" costume. And paying $90 to wear a costume I am not comfortable in? Not a chance!
Yet a costume at the Halloween party is absolutely mandatory. So, of course, I decided to DIY one that would fit inside my budget and comfort level when it came to modesty.
I went as a sailor.
I pulled out a knee length navy skirt and a white tshirt I had
I used white, red and blue duct tape I had left over from making
this costume for my son.
That Guy, with permission, took home a coffee filter for me. And I borrowed a headband from my daughter and my sons red marker. My only real cost here was $4.50 for three packages of brass buttons.
 |
| supplies for sailor costume |
First I put my skirt on and marked with chalk where I wanted my brass buttons.
 |
| marked in chalk |
I hand stitched the brass buttons in place
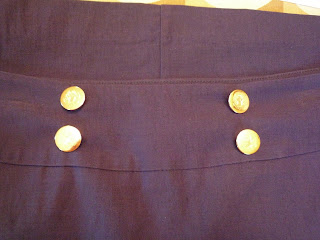 |
| brass buttons in place |
The tshirt was a crew neck. If I had a boat neck shirt I would have used that but I didn't. Also crew necks are not the most flattering on me which is why this shirt had never been worn. I was hoping that drawing a v neck onto the shirt might be just the thing. So using one of my sons washable markers (since I will not be wearing this costume next year the marker being washable was totally fine) I drew in a v neck and coloured what I hoped were nautical stripes.
 |
| nautical stripes? |
Using duct tape That Guy taped along my "v" for me and made the neckerchief design on the back of the shirt. We also added blue duct tape stripes to my sleeves and two white duct tape stripes to the bottom hem of my skirt
 |
| That Guy is such a great help! |
Next I tool a length of Bristol board cut into a strip and used duct tape to secure it into a circle. Any cardboard could work here though. Also, for the record I think I got the height here wrong. All night I was being asked if I was a flight attendant, but I think if I had cut the strip of Bristol board thinner it would have looked more "sailor-ish".
 |
| taped into a circle |
Then, using the coffee filter, I made the inside for the hat. Again, I think this would have been more successful if I had cut my cardboard thinner.
 |
| coffee filter hat- inexpensive and stylish |
Using more duct tape and another brass button I finished off my "hat". Upon reflection I think I would have been more successful in the sailor vibe if I had put an anchor rather than a bow on the hat. But I love bows so I did it my way. :)
 |
| who doesnt love a bow? |
I used some more duct tape to attach my coffee filter hat to a head band borrowed from my daughter. As you will see in the photo below, I also decided that the crew neck just did not work on my frame and decided to cut a small v neck into the shirt myself.
 |
| $4.50 costume |
That Guy also had to find something quick and in expensive to wear for this party. He went as Wolverine. He used his own leather jacket, shoes and jeans. He sacrificed one of his white t shirts to rip up and add faux blood too. The claws were a $10 purchase and he used a can of spray in black hair paint for $2.
 |
| Woverine/ That Guy |
We ended up with a total cost of under $17 for two adult Halloween costumes. Not too shabby in my books!


No comments:
Post a Comment